
You open your palette, stare at twenty shades, and still end up using the same brown you always do. Sound familiar?
The fix isn’t a new palette. It’s a plan. These 11 eyeshadow look ideas each come with a clear recipe: which shades to pick, where to put them, and how to finish. They range from five-minute everyday washes to full-on evening drama. Save the ones that catch your eye, because you’ll want to come back to them.
Before You Start: 4 Quick Prep Rules for Any Eyeshadow Look
Every look below goes on better when you set it up properly.
- Prime your lids. An eyeshadow primer or a dab of concealer gives pigment something to grip and stops creasing.
- Use the light, medium, dark rule. Most polished looks use one light shade for the lid, one medium for blending, and one dark for depth.
- Blend more than you think you need to. Soft edges make even bold colors look intentional.
- Tap off excess powder. Fallout is the quickest way to ruin a clean look, so tap your brush before it touches your lid.
Save-worthy tip: If a look feels too intense halfway through, don’t add more product. Take a clean fluffy brush and blend the edges for 30 seconds.
1. The Soft Neutral Wash (Your Everyday Go-To)
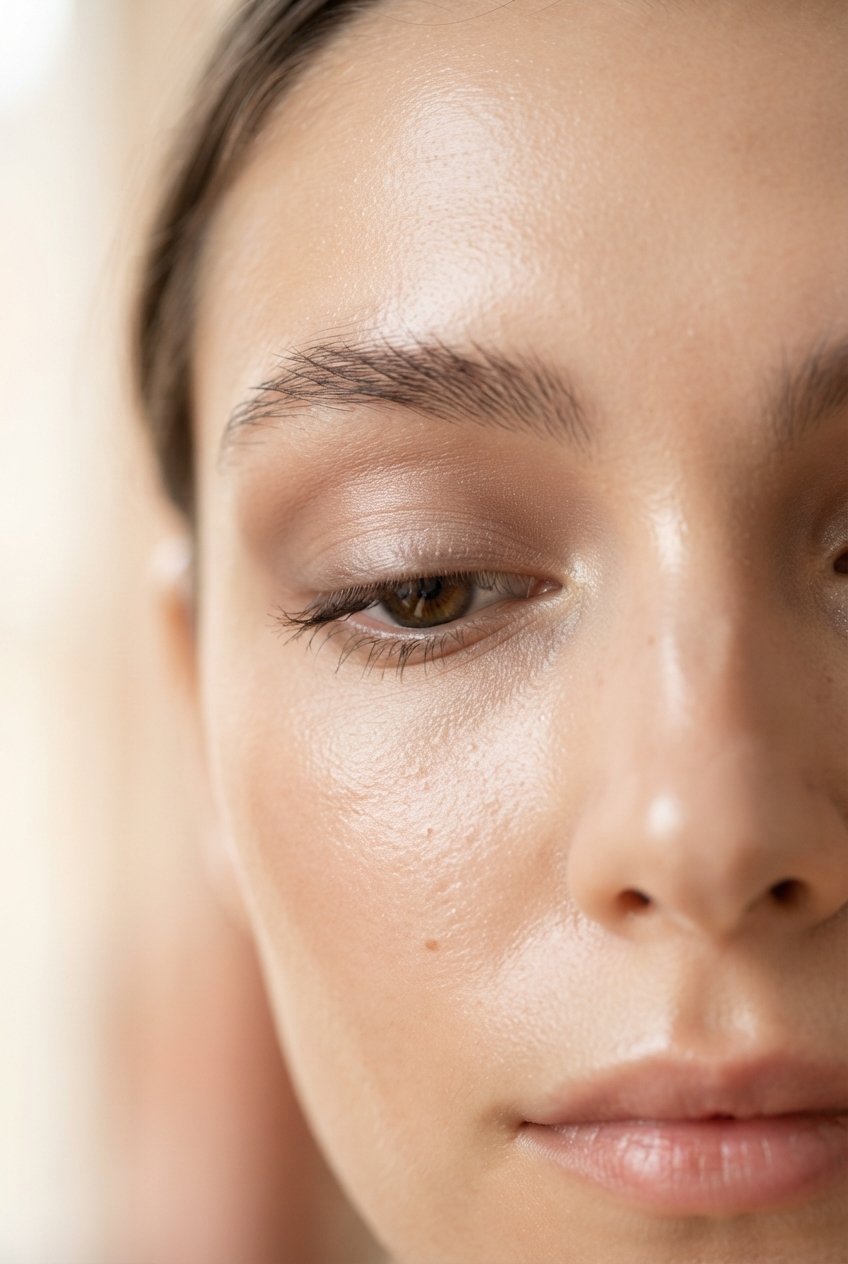
This is the “I woke up like this, but better” look. It works for the office, errands, or a casual brunch.
Shades: a creamy beige, a soft taupe, and a matte warm brown.
How to do it:
- Sweep the beige all over the lid and up to the brow bone.
- Add taupe to the crease with a fluffy brush, using light windshield-wiper motions.
- Place a touch of warm brown in the outer corner for gentle definition.
- Finish with mascara and you’re done.
Why it works: The tonal shades add depth without looking like “makeup,” so it flatters nearly every eye color.
2. The One-Shadow Halo Eye
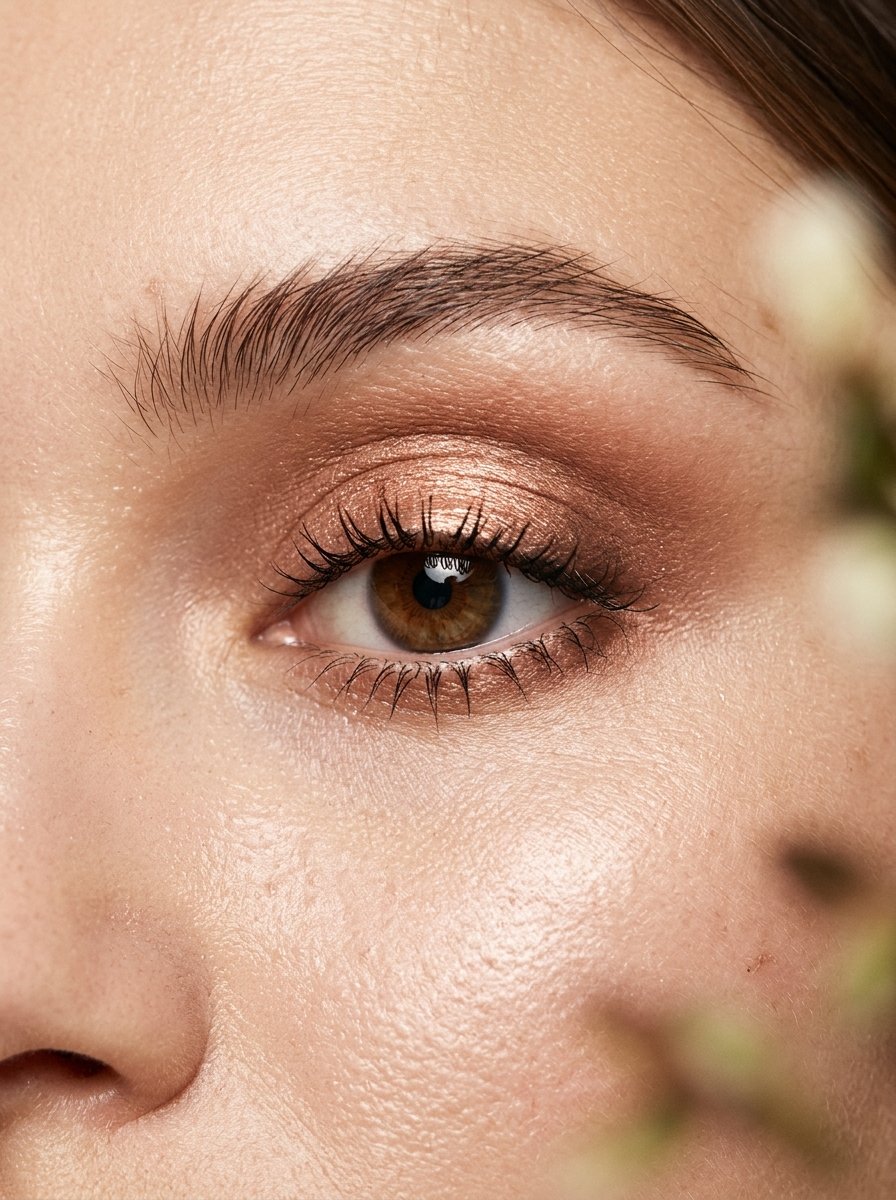
If you only own one pretty shimmer, this look is for you. It’s soft, rounded, and eye-catching.
Shades: a single shimmer (champagne, rose gold, or bronze) plus a matte brown for the edges.
How to do it:
- Press the shimmer onto the center of your lid with your finger or a flat brush.
- Use a matte brown on the inner and outer corners, leaving the center bare.
- Blend where the two meet until there’s no hard line.
Pro tip: Pressing shimmer with your finger gives far more payoff than sweeping it on with a brush.
3. Classic Brown Smoky Eye
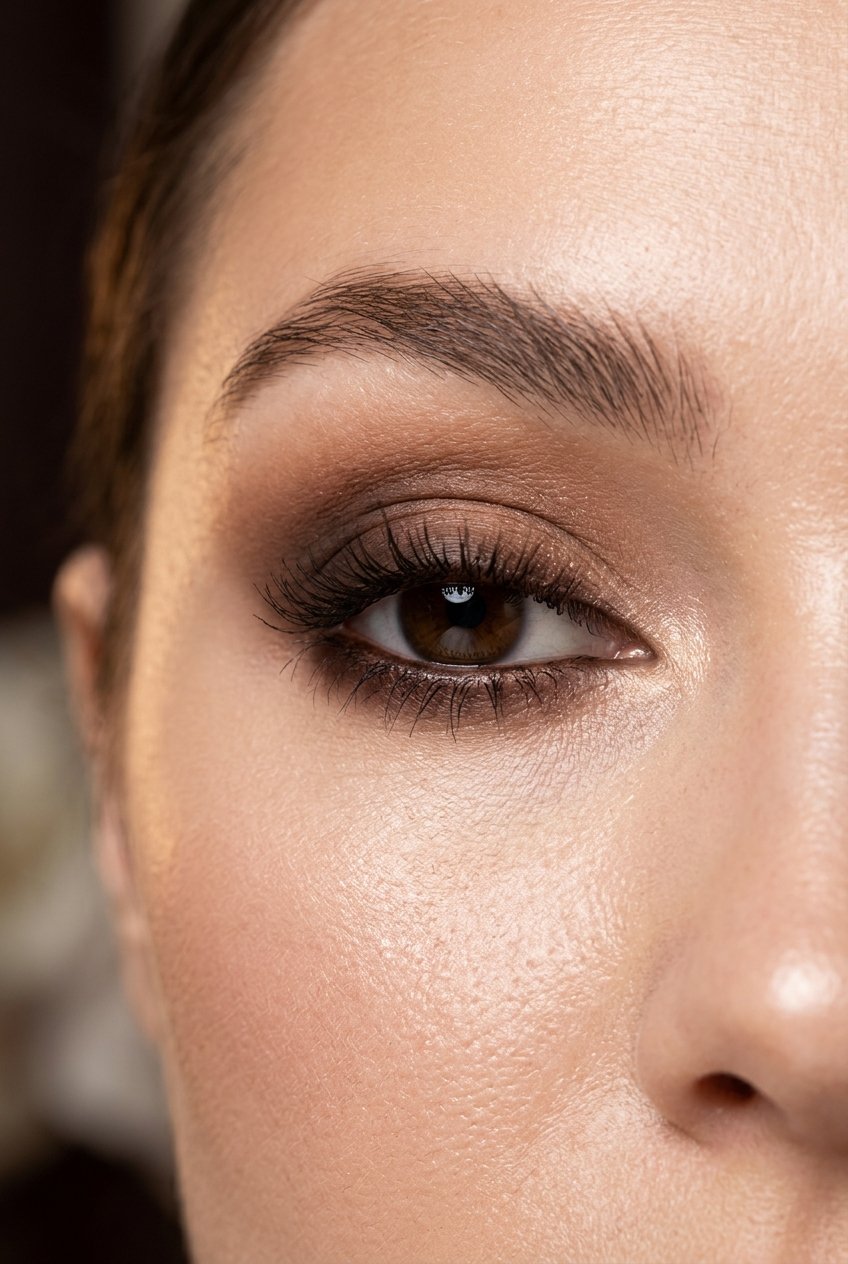
A smoky eye doesn’t have to mean black. Brown smoke is easier to blend, more flattering in daylight, and just as sultry at night.
Shades: a light shimmery champagne, a medium chocolate, and a deep espresso.
How to do it:
- Start with the medium brown in the crease, blending up and out.
- Smudge the espresso along the upper lash line and into the outer third of the lid.
- Pat champagne onto the center of the lid and inner corner to brighten.
- Smoke the dark shade lightly under the lower lash line.
Why it works: The bright center makes the eyes look bigger, while the dark outer edges add depth.
4. The Cut Crease
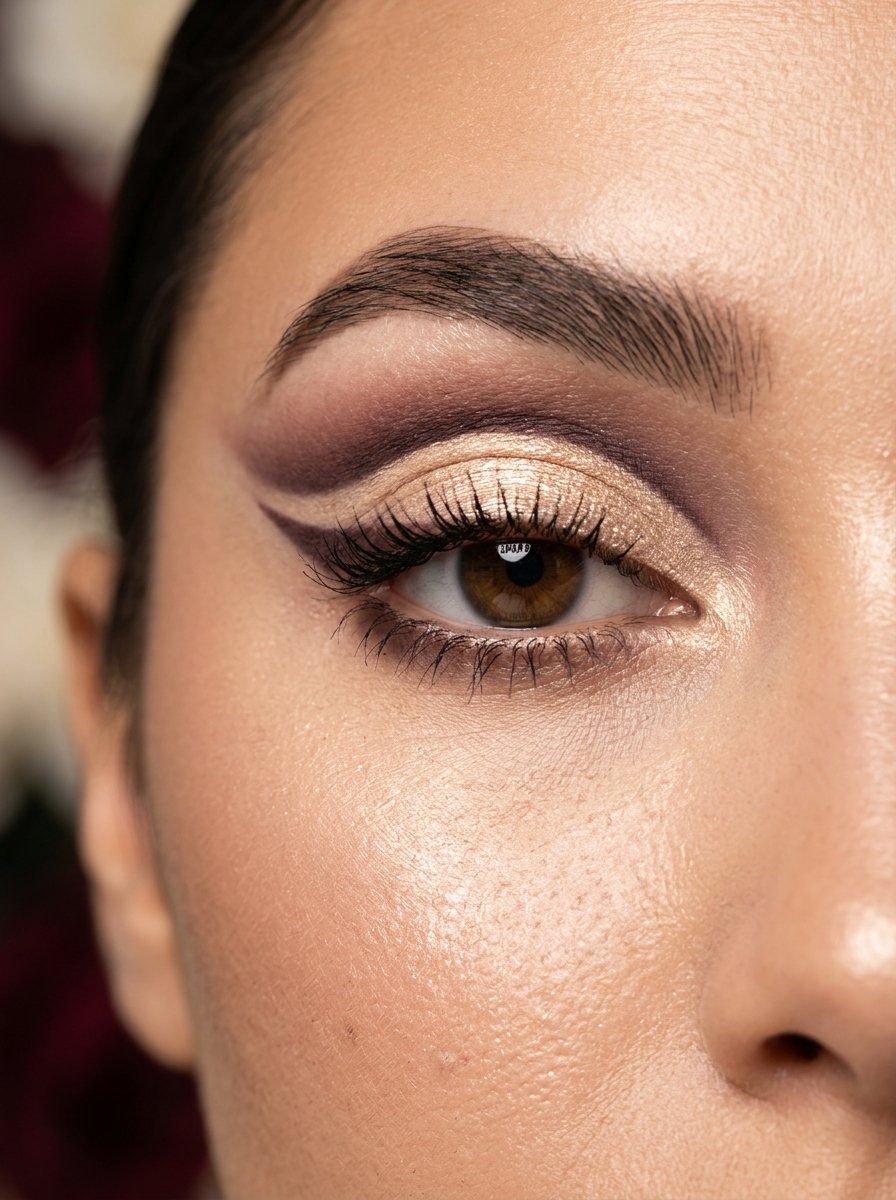
Sharp, graphic, and always a showstopper. A cut crease creates a crisp line that makes the lid look more open and sculpted.
Shades: a matte crease color (plum, mocha, or soft burgundy) and a bright lid shade or shimmer.
How to do it:
- With your eyes open, mark where you want the crease line.
- Blend your crease color just above that line.
- Dab concealer along the lid to “cut” the crease crisp, then press your lid shade on top.
Pro tip: Keep your eyes open while placing the crease. It’s the easiest way to avoid a line that disappears when you blink.
Read also: Bridal make up
5. Soft Glam Bronze
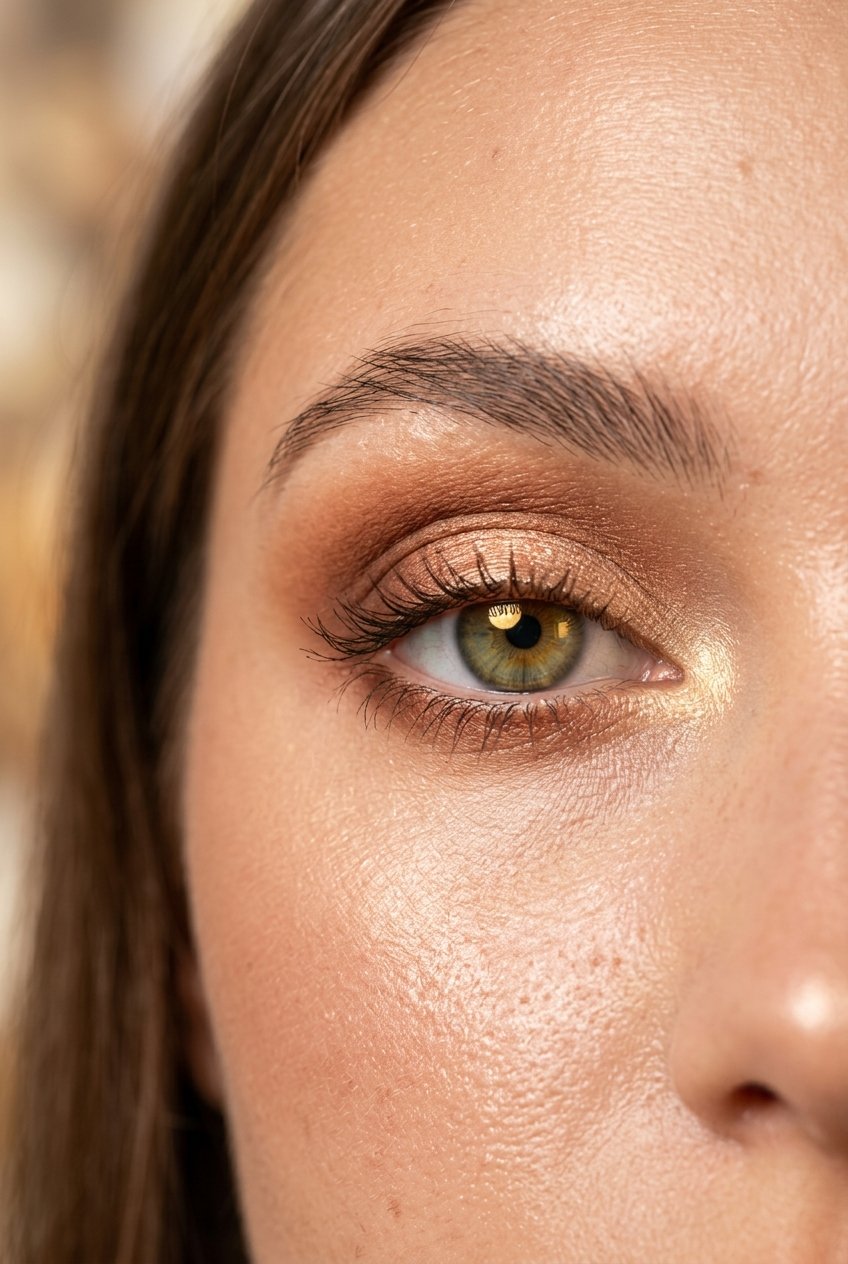
Think warm, glowy, and expensive-looking. Bronze tones work beautifully on brown, hazel, and green eyes.
Shades: a matte peach for the base, a copper-bronze shimmer, and a deep brown for definition.
How to do it:
- Blend peach across the crease and lid as a base.
- Press the bronze shimmer on the lid.
- Define the outer corner with brown.
- Add a little shimmer to the inner corner.
Style it: Pair with a nude-pink lip and a hint of blush for a polished date-night look.
6. The Pastel Dream
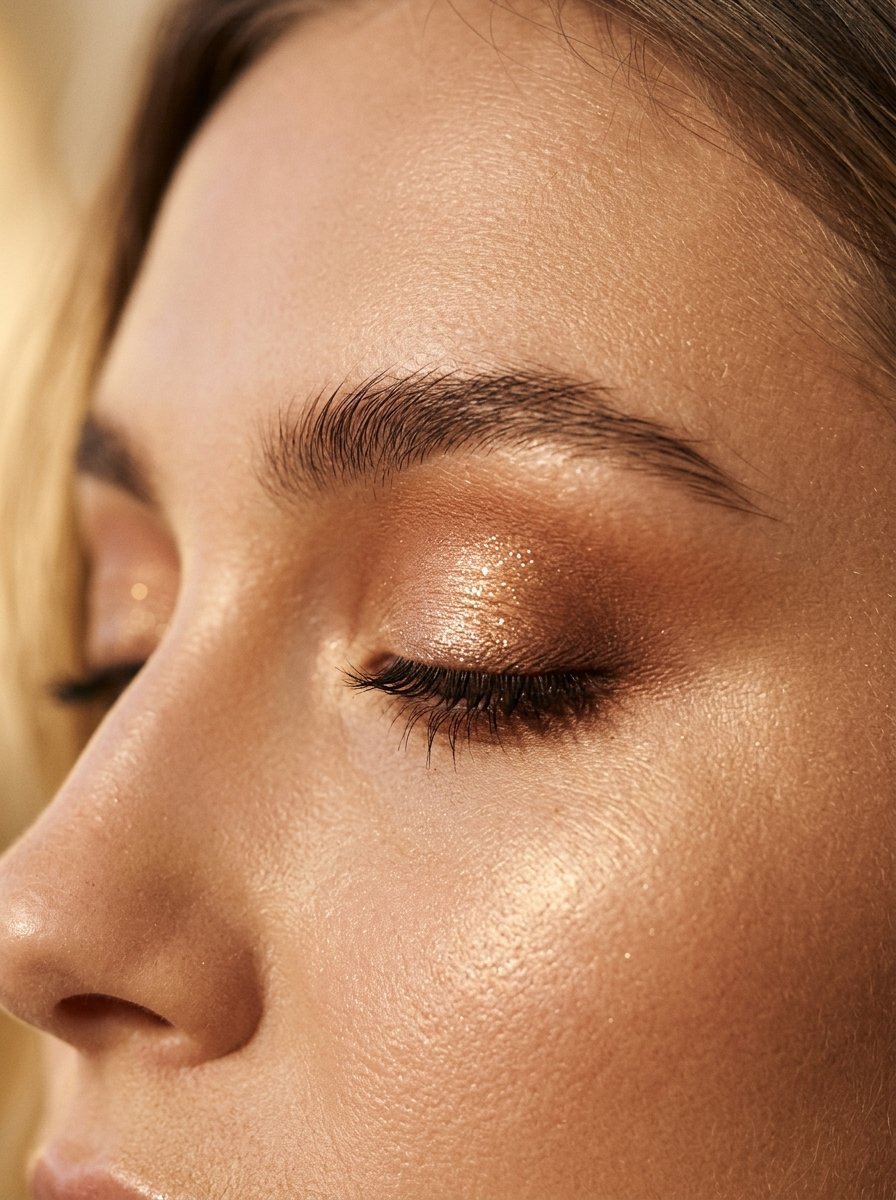
Pastels have shaken off their “hard to wear” reputation. Lilac, baby blue, and mint green look fresh and playful, especially in spring.
Shades: one pastel matte or satin shade, plus a soft white for the inner corner.
How to do it:
- Apply your pastel across the lid and slightly above the crease.
- Brighten the inner corner with soft white.
- Keep the rest of your makeup minimal: bare skin, soft lashes, a neutral lip.
Pro tip: Pastels show up best over a white or skin-tone base, not directly on a bare lid.
7. Graphic Colored Liner
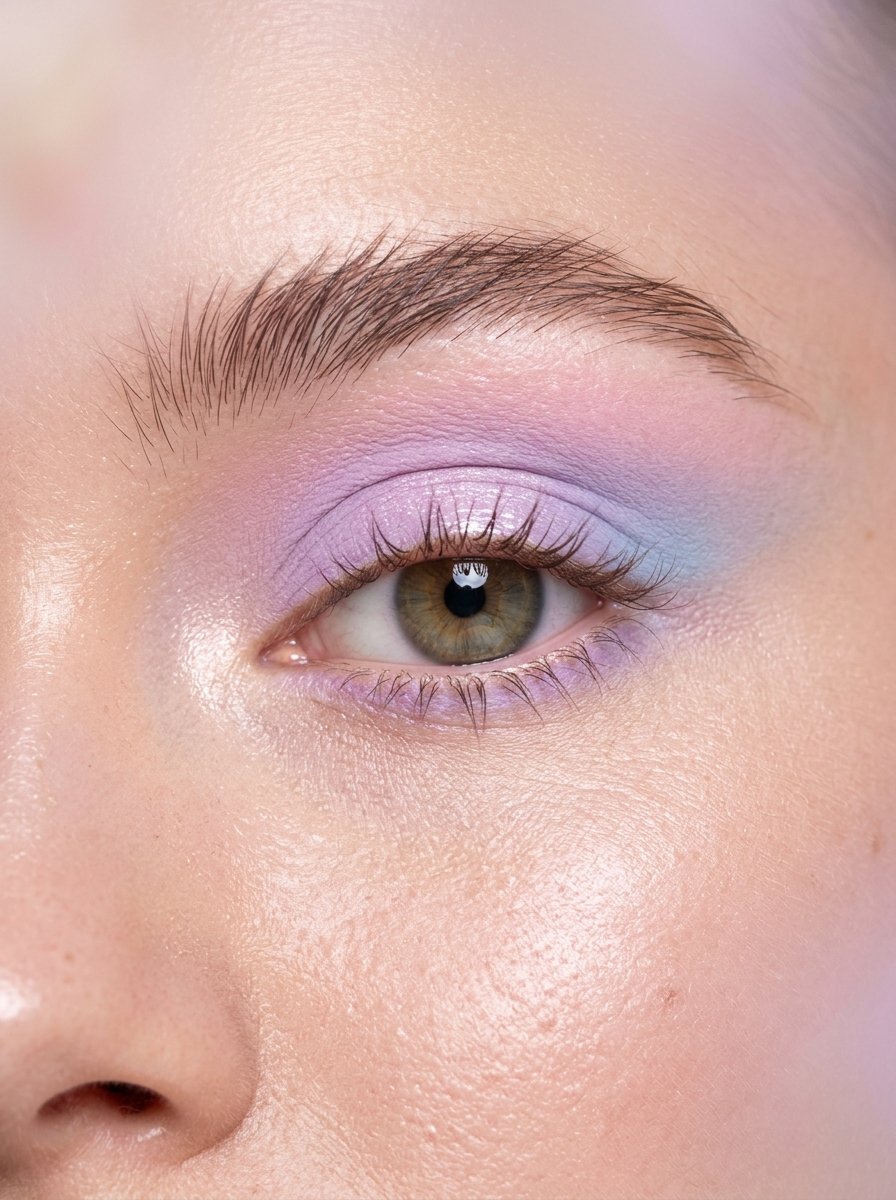
Not every look needs a blended lid. Colored liner is the fastest way to look creative with almost no effort.
Shades: a bright liner shadow (cobalt, emerald, or violet) plus a fine angled brush.
How to do it:
- Wet your angled brush slightly and pick up the color.
- Draw a thin line along the upper lash line, extending it into a small wing.
- Add a touch of the same color to the lower lashes if you’re feeling bold.
Why it works: A single pop of color makes a neutral outfit and simple skin feel designed.
8. The Sunset Gradient
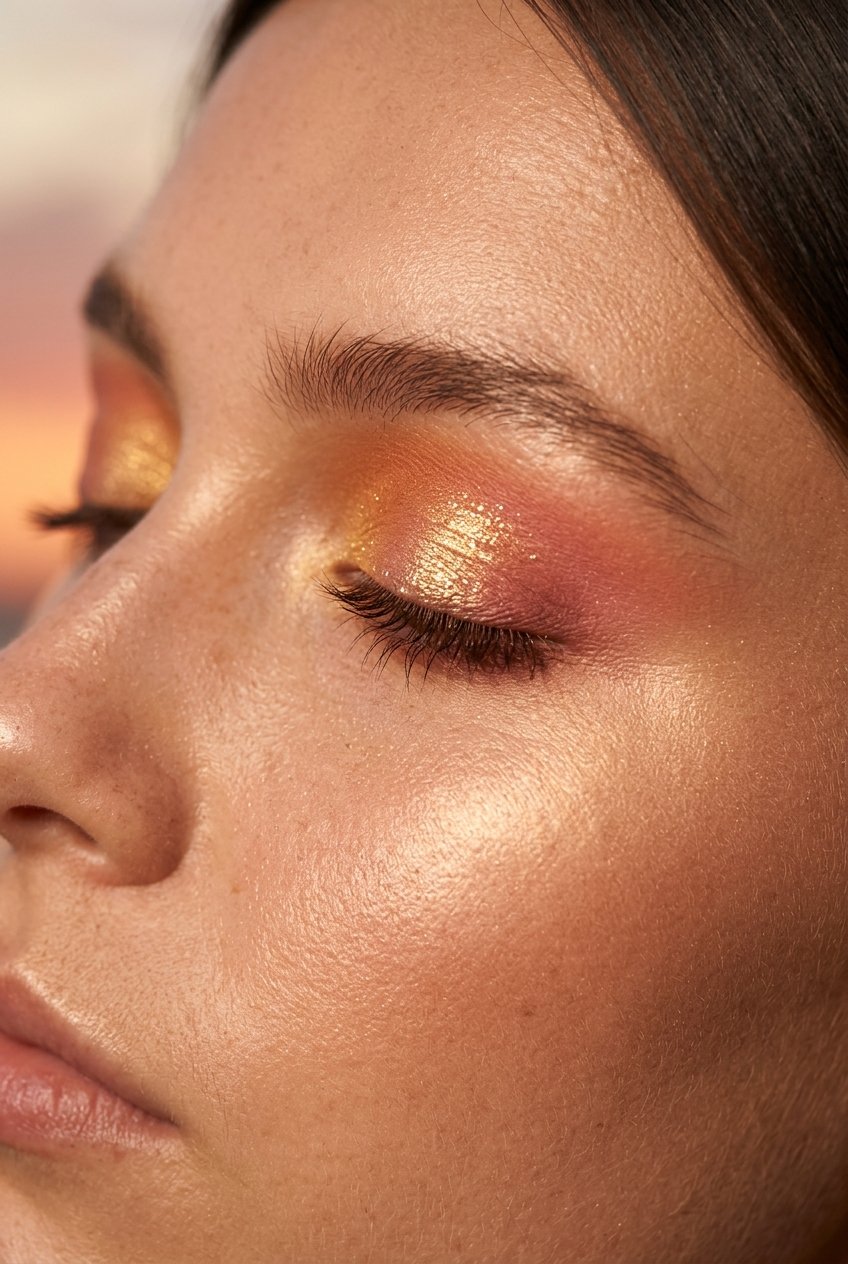
Warm oranges, pinks, and golds blend together like the sky at dusk. It’s stunning at summer events, festivals, and vacations.
Shades: a golden yellow, a coral-orange, and a rosy pink.
How to do it:
- Place gold on the inner third of the lid.
- Blend coral through the middle.
- Finish the outer third with rosy pink, blending each transition well.
- Add a touch of gold shimmer at the center of the lid.
Pro tip: Work from lightest to darkest and blend between each color before adding the next, so the shades melt together instead of looking striped.
9. The Monochrome Eye
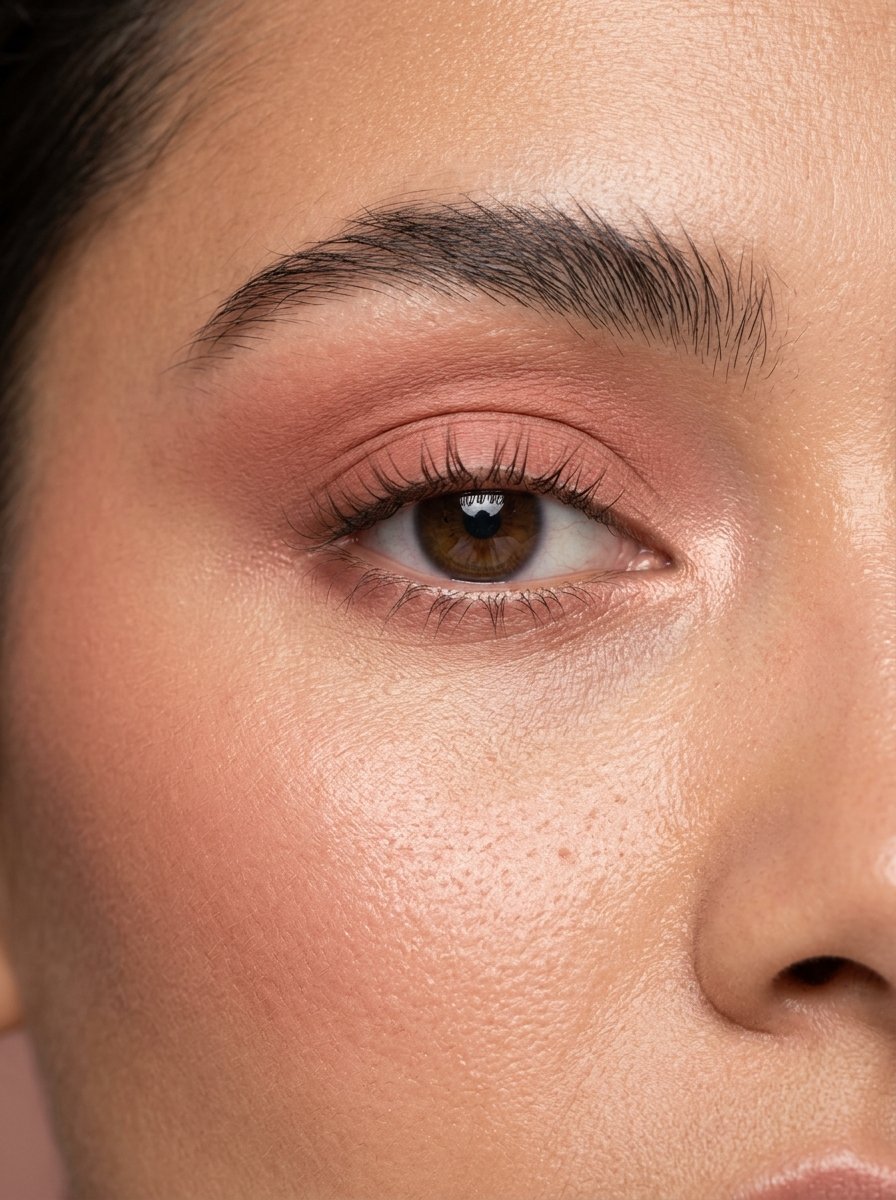
Using one color family across your eyes (and sometimes cheeks) looks modern and effortless.
Shades: a rose, berry, or terracotta palette in matte and shimmer finishes.
How to do it:
- Use the lightest shade across the lid.
- Deepen the crease with the medium shade.
- Smudge the darkest shade along the lash line.
- Tap a little of the same color onto your cheeks for a cohesive finish.
Style it: Match the look to your lipstick for a pulled-together effect that takes almost no thought.
10. The Glossy Wet-Look Lid
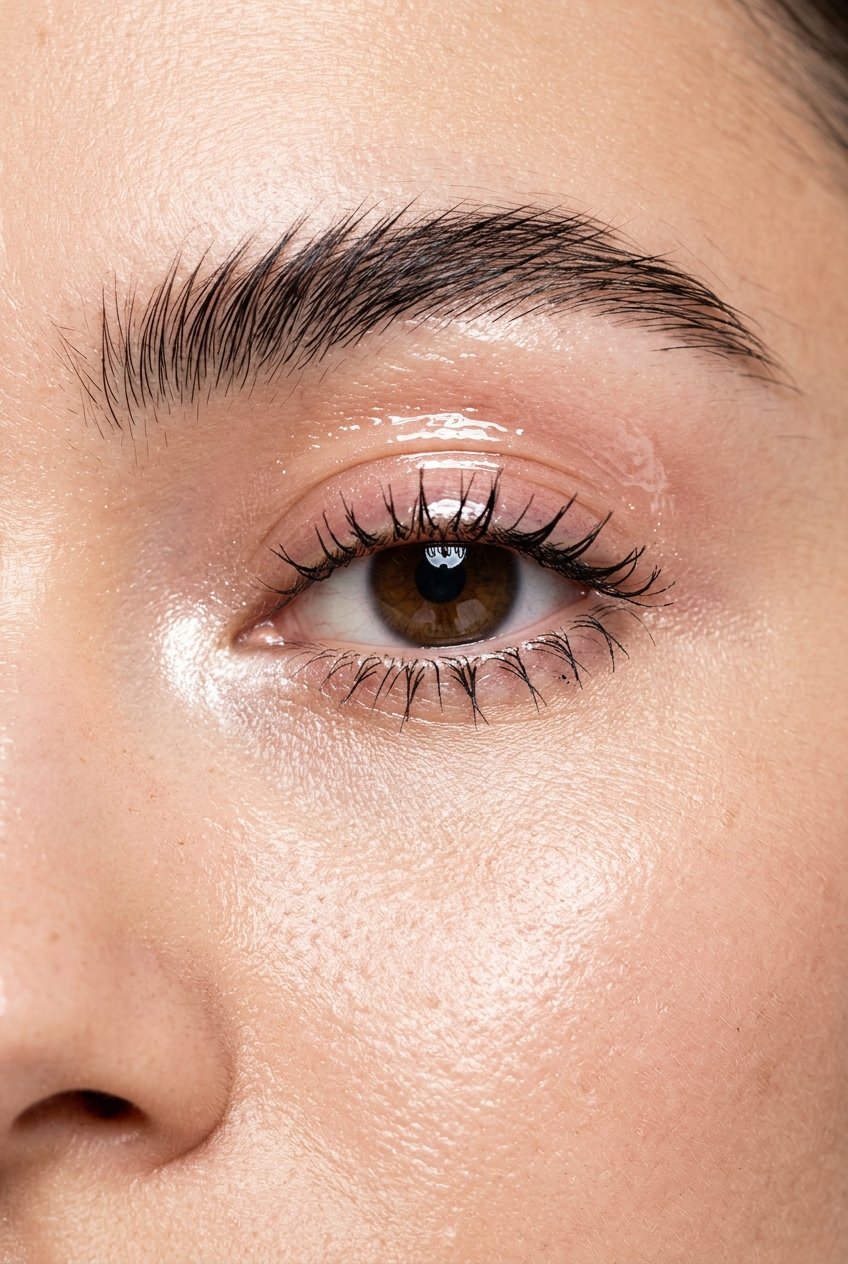
Glossy lids are bold, editorial, and surprisingly easy.
Shades: any powder or cream shadow in green, bronze, or champagne, plus an eye-safe clear gloss or balm.
How to do it:
- Apply your shadow all over the lid and blend the edges.
- Press a tiny amount of clear gloss over the center of the lid with your fingertip.
- Keep the rest of your makeup matte to balance the shine.
Heads-up: Use only products that are labeled safe for the eye area, and avoid the lash line.
11. The Black and Silver Night Out
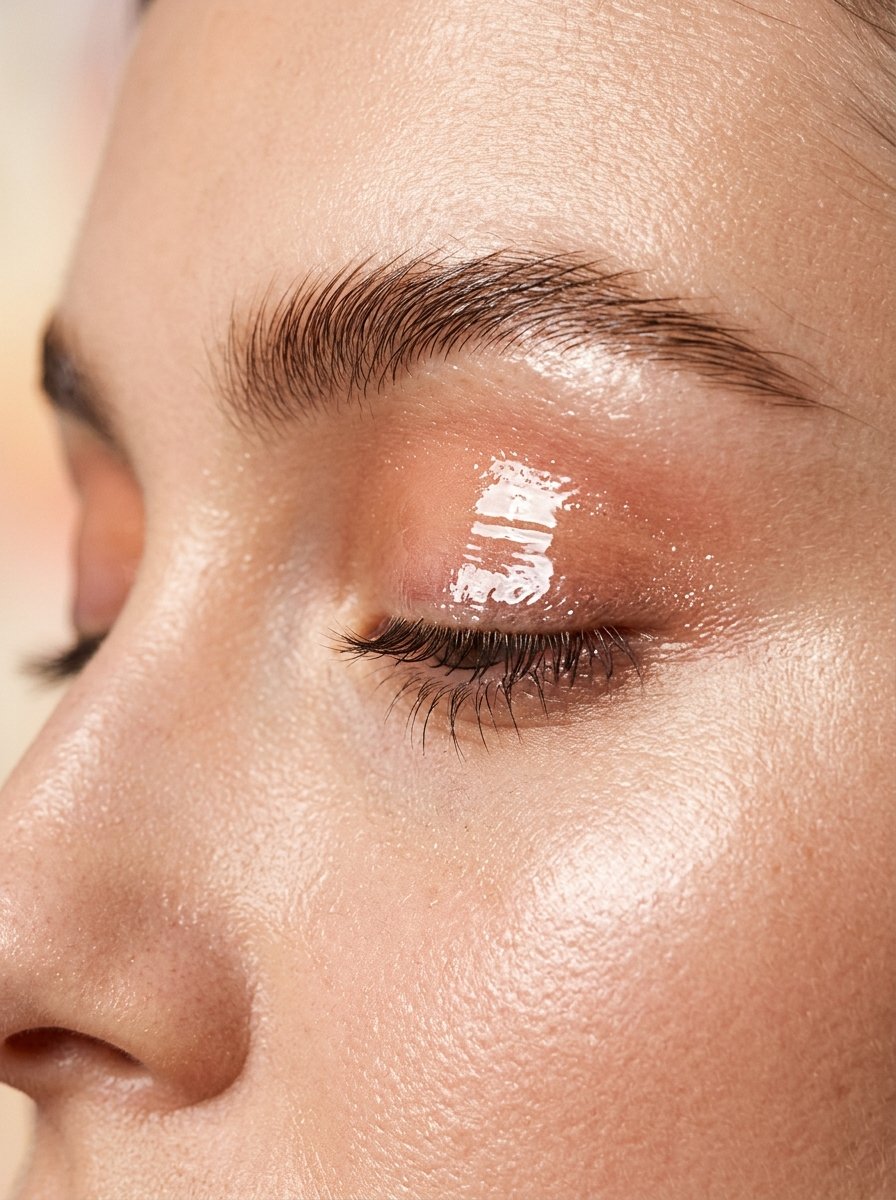
For parties, concerts, or nights when you want to feel unstoppable, this one delivers.
Shades: a matte black, a charcoal grey, and a bright silver or gunmetal shimmer.
How to do it:
- Blend charcoal into the crease for a soft transition.
- Pack black onto the outer corner and along the upper lash line.
- Press silver over the center of the lid and the inner corner for a metallic flash.
- Smudge a little black under the lower lashes and add plenty of mascara.
Pro tip: Do the eyes before your foundation so you can wipe away black fallout without touching your base.
Common Eyeshadow Mistakes (and Easy Fixes)
- Skipping primer. Result: creasing and fading. Fix: always prep the lid.
- Starting with the darkest shade. Result: a heavy, muddy look. Fix: build gradually from light to dark.
- Using the wrong brush. Result: harsh edges. Fix: use a fluffy brush for blending and a flat brush for packing color.
- Forgetting the lower lash line. Result: an unbalanced look. Fix: smudge a little of your crease shade underneath.
- Over-blending shimmer. Result: it vanishes. Fix: press shimmer on; don’t sweep it.
How to Choose the Right Eyeshadow Look for You
By occasion:
- Work or school: Soft Neutral Wash, One-Shadow Halo
- Date night: Soft Glam Bronze, Brown Smoky Eye
- Parties: Black and Silver, Cut Crease
- Daytime fun: Pastel Dream, Graphic Liner
By eye color:
- Brown eyes: bronze, plum, emerald, and teal all pop.
- Blue eyes: warm copper, peach, and golden browns create contrast.
- Green eyes: plum, burgundy, and rosy bronze bring out the green.
- Hazel eyes: gold, olive, and warm purple flatter the mix of colors.
These are starting points, not rules. If you love a shade, wear it.
Frequently Asked Questions
What is the easiest eyeshadow look for beginners?
The Soft Neutral Wash is the simplest. It uses three shades in basic positions and is very forgiving if your blending isn’t perfect.
How do I stop eyeshadow from creasing?
Start with an eyeshadow primer, use thin layers instead of one thick coat, and set the base with a matching powder shade before adding color.
Do I need a lot of brushes?
No. A flat shader brush, a fluffy blending brush, and a small angled brush cover almost every look on this list.
Can I use bronzer or blush as eyeshadow?
Yes. Matte bronzer works well as a crease shade, and a powder blush can create a warm, cohesive monochrome look.
How do I make my eyes look bigger with eyeshadow?
Place light, shimmery shades on the center of the lid and inner corner, and keep darker shades toward the outer corner.
How long does eyeshadow last?
Powder eyeshadow usually lasts around two to three years. Replace it sooner if it smells odd, changes texture, or irritates your eyes.
Final Thoughts
You don’t need to master all eleven looks at once. Pick one, practice it this week, and then try another. The more you play with placement, blending, and color, the more instinctive it gets.
Which look are you trying first? Save this list, and come back whenever your palette needs a little inspiration.
